Picture water slowly tracking under your roof tiles during Sydney’s next downpour. Not through obvious damage you can see, but through tiny gaps where metal meets tile. That’s the reality when flashing fails. And it happens more often than most homeowners realise.
At Sydney Wide Roofing Co, we’ve worked on many tiled roofs across Sydney, and here’s what consistently surprises people: broken tiles aren’t the main cause of leaks. Damaged or poorly installed flashing is. Those thin metal strips sealing your valleys, chimneys, and wall junctions do the real heavy lifting when rain hits. When they fail, water finds its way inside.
After the recent storm systems that battered Sydney’s Eastern Suburbs and Northern Beaches, we saw this firsthand. Homes with 10-year-old roofs were leaking. Not because the tiles were gone, but because the flashing underneath had rusted through or lifted away from its seal.
This guide walks you through everything about flashing on tiled roofs: what it does, how to spot problems early, when you can patch things up, and when you need a full replacement. We’ll also share what current Australian building standards require, so you know if your roof meets today’s weatherproofing requirements.
What Flashing Actually Does on Your Tiled Roof
Think of flashing as the seal between different roof sections. Tiles shed water brilliantly when they’re laid flat across a slope. But what happens where two roof planes meet in a valley? Or where your roof butts against a brick wall? Or around your chimney?
That’s where flashing takes over.
These metal strips, usually aluminium, galvanised steel, or Colorbond, get installed at every junction point. They create a continuous waterproof barrier that directs rain over your tiles and into your gutters, rather than letting it seep underneath.
Here’s where flashing protects your home:
- Valleys (where two roof slopes meet at an angle)
- Wall junctions (where your roof meets vertical surfaces)
- Chimneys (around the base and up the sides)
- Skylights (framing the opening)
- Penetrations (vent pipes, whirly birds, satellite mounts)
- Ridge caps (along the peak of your roof)
Sydney Wide Roofing Co sees this pattern repeatedly: homeowners focus on visible tile damage and completely miss flashing issues hidden underneath. Then one heavy rain event exposes the problem through ceiling stains or drips.
The Sydney roofing company approach involves checking flashing first during inspections, because that’s usually where leaks start.
Clear Warning Signs Your Flashing Needs Attention
Flashing problems don’t announce themselves. You won’t hear tiles sliding off, and you probably won’t see obvious damage from ground level. The signs show up in subtler ways.
Interior warning signs:
Water stains appearing on your ceiling, especially near walls or in corners, often point to flashing failure rather than broken tiles. Damp patches that appear during or after rain, then fade as things dry out, suggest water is getting past your flashing but hasn’t caused constant leaking yet.
Musty smells in your roof cavity or upper rooms indicate moisture is accumulating somewhere it shouldn’t be.
Exterior clues to look for:
Rust streaks or visible corrosion on metal flashing components tell you deterioration is well underway. This happens faster in coastal areas like the Northern Beaches, where salt air accelerates metal breakdown.
Lifted or buckled flashing sections create gaps where water enters. This often happens after strong winds or when the original installation didn’t use enough fasteners.
Cracks in the flashing material itself, visible gaps between the flashing and tiles or walls, and missing sections (sometimes blown off during storms) all need immediate attention.
Mortar that’s crumbling away from chimneys or ridge caps often hides corroded flashing underneath. The mortar failing is actually a symptom of the bigger problem below.
After Sydney’s recent storm activity, we noticed a surge in calls about leaks that appeared suddenly. In most cases, the flashing had been gradually deteriorating, and the heavy rain finally pushed water through compromised seals. Regular inspections after significant weather events can catch these issues before they become major problems.
Why Flashing Fails on Sydney’s Tiled Roofs
Understanding what causes flashing to fail helps you prevent problems. Several factors work against flashing materials, especially in Sydney’s variable climate.
Poor Installation From the Start
This is the biggest culprit. When flashing isn’t installed according to Australian Standard AS 2050, problems emerge quickly.
Common installation mistakes include:
- Insufficient overlaps (less than the required 75mm)
- Wrong moulding into tiles, leaving gaps
- Missing upturns at wall junctions
- Using incompatible metals that create galvanic corrosion
We’ve seen valley flashing installed without proper underlayment, apron flashing at walls with upturn heights below the 75mm minimum required by current codes, and step flashing along brick walls with gaps you could fit your finger through.
The National Construction Code (NCC 2022) sets clear requirements for flashing installation. These aren’t suggestions, they’re mandatory standards that protect your home. Proper installation means 75mm minimum overlaps in the direction of water flow, 150mm minimum width for most applications, and correct moulding into the tile profile.
Material Breakdown and Corrosion
Even quality flashing has a lifespan. Colorbond and Zincalume flashings typically last 15 to 30 years depending on the environment, but several factors accelerate deterioration.
Coastal exposure: Properties in areas like Manly, Coogee, or Cronulla face constant salt air. This corrodes metal flashing faster than inland locations. What might last 25 years in Parramatta could need replacement in 15 years at Bondi.
Incompatible materials: Mixing different metals without proper separation creates galvanic corrosion. For example, copper flashing touching galvanised iron causes accelerated rusting. We see this often in older homes where repairs used whatever material was available.
UV and thermal stress: Sydney’s intense summer sun causes metal to expand and contract daily. Over years, this movement cracks sealants and loosens fasteners. The thermal cycling is particularly hard on valley flashing, which can’t expand freely when locked under mortar or tiles.
Storm Damage and Physical Impact
Sydney’s weather throws everything at your roof. The heavy rain events, strong winds, and occasional hail that hit different parts of the metro area each year take their toll.
Wind lifts flashing sections when fasteners corrode or when the original installation didn’t use enough. Flying debris during storms can dent or pierce flashing. Hail impact, while usually absorbed by tiles, can damage exposed metal at valleys or ridges.
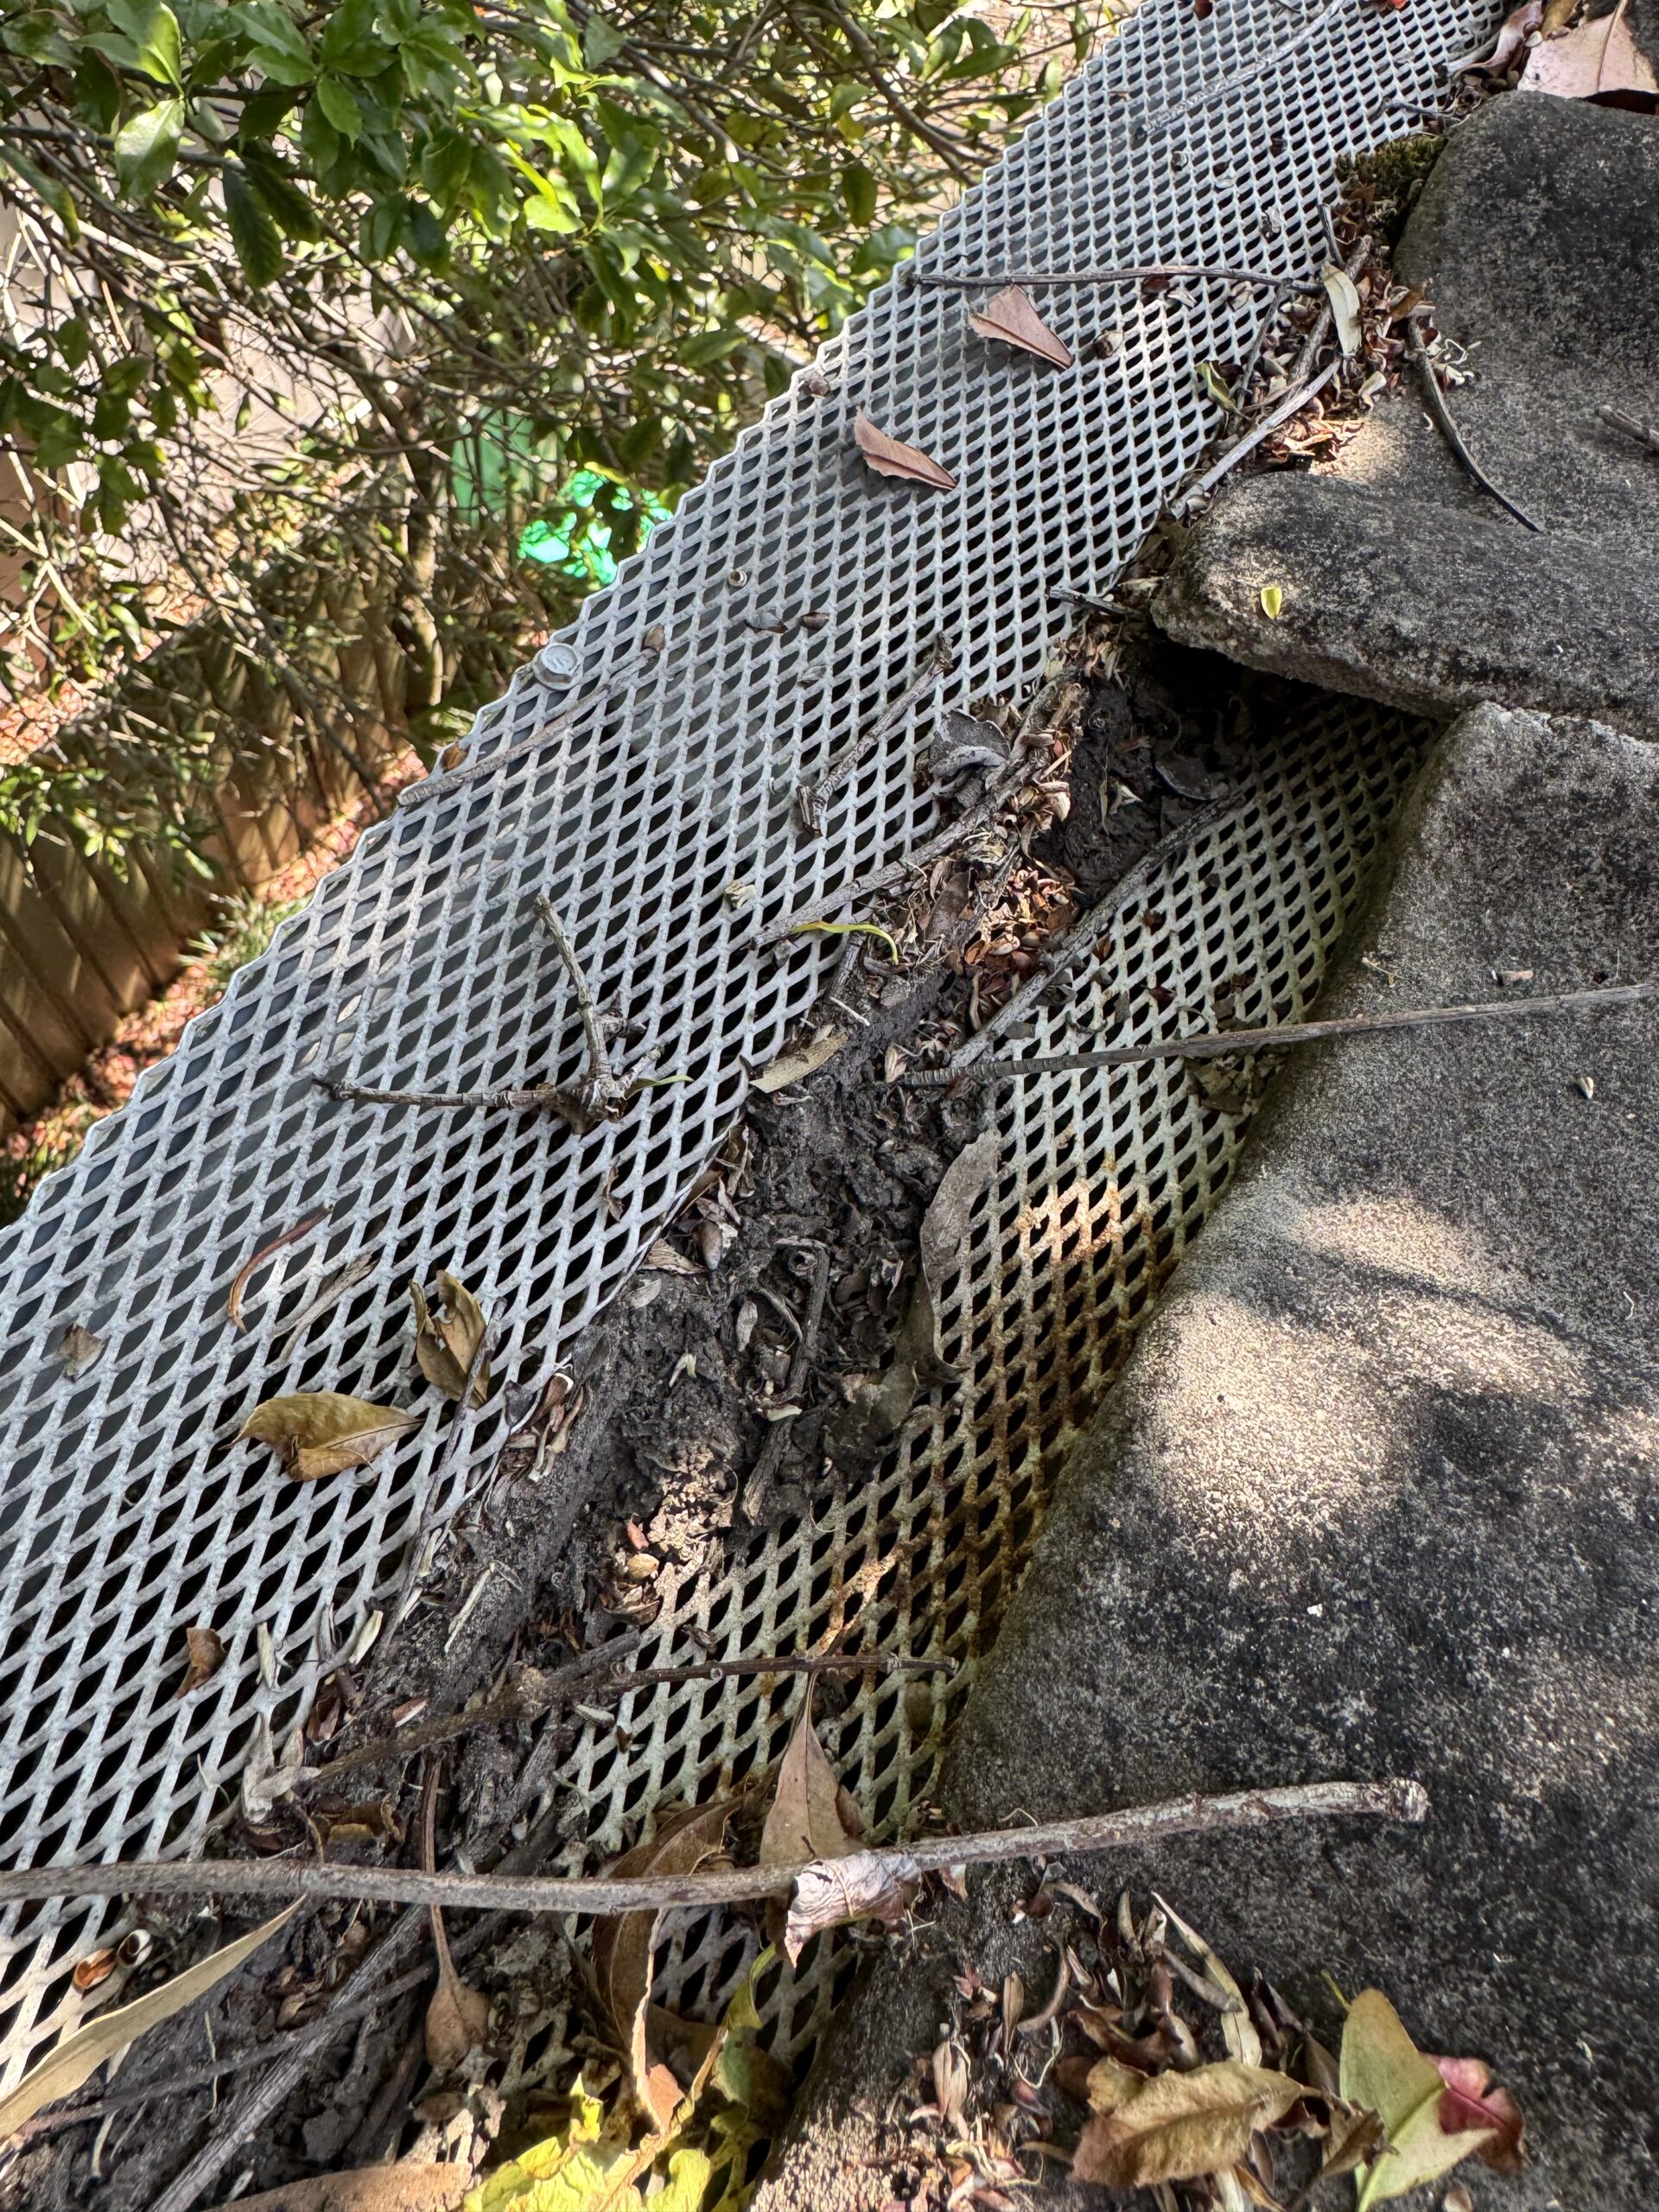
Tree debris is another factor. Leaves and twigs accumulate in valleys, holding moisture against the metal. This creates perfect conditions for rust to develop, often hidden under the debris. We’ve found completely corroded valley flashing buried under years of accumulated leaves, with homeowners having no idea the problem existed.
Repair vs Replacement: Making the Right Choice
Here’s the practical question: can you repair the flashing, or does it need full replacement? The answer depends on the extent and location of damage.
When Repair Makes Sense
Minor flashing problems can often be fixed without replacing entire sections. Repair works well for:
Small rust spots or surface corrosion: If caught early, before rust penetrates through the metal, treatment and resealing can extend the flashing’s life by several years. This involves wire brushing the affected area, applying rust converter or primer, then sealing with appropriate flashing tape or coating.
Isolated lifting or gaps: A section of step flashing that’s pulled away from the wall can often be resealed. This requires cleaning the joint thoroughly, applying new sealant rated for outdoor exposure, and ensuring proper fastening.
Single damaged sections: If one piece of step flashing is damaged but surrounding sections are sound, replacing just that piece makes economic sense. This is common after localised storm damage or when work on other building elements (like repointing brickwork) disturbs the flashing.
Minor gaps around penetrations: Small openings around vent pipes or similar penetrations can usually be sealed using compatible flashing boots or tape products. These are designed to accommodate movement and maintain a weathertight seal.
The key is addressing repairs promptly. Small problems grow into major ones quickly when water is involved. A $180 reseal today prevents a $1,200 ceiling repair next year.
When Full Replacement Is Necessary
Some situations require replacing flashing completely. This is typically the case when:
Corrosion is widespread: Once rust has eaten through the metal in multiple locations, patching becomes futile. You’re just buying a bit more time before the next failure. Complete replacement with quality materials and proper installation gives you another 15 to 30 years of protection.
The roof is over 20 years old and never had flashing maintenance: If your tiled roof has original flashing from two decades ago, it’s likely nearing the end of its useful life. Replacing it proactively during other roof work (like repointing or tile replacement) makes practical and financial sense.
Repeated leaks keep occurring: If you’ve had multiple repairs in the same area and leaks persist, the underlying flashing system has probably failed. This happens often with valley flashing, where rust develops under mortar or where the original installation didn’t follow current standards.
During major roof restoration work: When you’re already lifting tiles for repointing ridge caps or replacing broken tiles extensively, replacing aged flashing at the same time is cost-effective. The access work is already done, and you avoid separate projects later.
Following significant storm damage: If severe weather has lifted, torn, or significantly damaged flashing sections, replacement usually costs only marginally more than extensive repairs and gives you a much better long-term outcome.
Types of Flashing Used on Tiled Roofs and Their Specific Challenges
Different roof junctions require different flashing types. Understanding what’s installed on your roof helps you communicate with contractors and understand repair requirements.
Valley Flashing
Valleys handle the highest water concentration on your roof. Rain from two roof slopes converges here, creating high flow volumes during storms. This makes valley flashing one of the most critical components and, unfortunately, one of the most prone to failure.
Material options: Traditional valley flashing used lead, now banned in many Australian water catchment areas. Modern valleys use Colorbond steel, Zincalume, or lead-free alternatives like Wakaflex tape. Metal valleys last longer but require careful installation to prevent stress cracking. Flexible tape products install easier but may have shorter lifespans in high-traffic areas.
Common problems: Rust developing under mortar (hidden until severe), debris accumulation holding moisture, improper width allowing water to overflow onto tiles, and insufficient underlayment beneath the flashing.
We regularly find valley flashing that looks fine from below but has completely corroded underneath the mortar or tile edges. The first sign is often a persistent leak during heavy rain, by which point water has been tracking into the roof cavity for months.
Australian Standard requirements: AS 2050 specifies minimum valley widths based on roof pitch and climate zone. Sydney’s typical rainfall requires wider valleys than drier regions. The standard also mandates proper side laps and fixings to prevent water infiltration.
Apron and Step Flashing at Walls
Where your roof meets a vertical surface, whether brick, weatherboard, or rendered wall, you need either apron flashing (for the base of walls running across the roof slope) or step flashing (for walls running parallel to the slope).
How they differ: Apron flashing is one continuous piece installed where the roof meets the bottom of a wall, with the top edge turned up the wall at least 75mm. Step flashing uses multiple interlocking pieces that weave in with each course of tiles.
Failure patterns: The seal where flashing meets the wall is vulnerable. Sealant dries out and cracks, especially on north-facing walls with high sun exposure. The upturn height is critical. If it’s less than 75mm or if heavy rain creates splashback, water gets behind the flashing.
Brick mortar often holds the top edge of apron flashing. As mortar deteriorates, it pulls away from the flashing, creating a gap where water enters. We see this frequently in older terraces across the Inner West and Eastern Suburbs.
Modern installation: Current best practice involves installing a membrane behind the flashing at the wall junction, providing a secondary barrier. The flashing is then properly sealed and mechanically fastened, not just relying on mortar alone.
Chimney Flashing
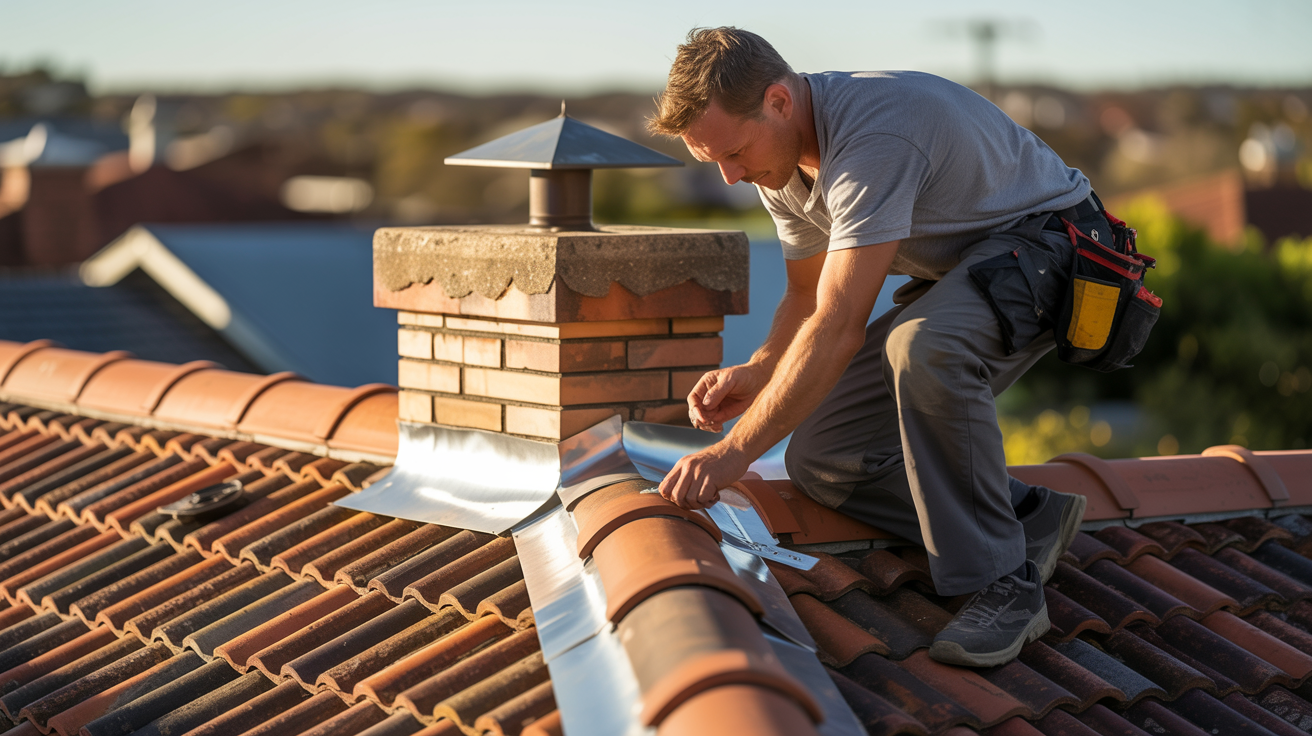
Chimneys penetrate your roof completely, requiring a comprehensive flashing system with multiple components: base flashing at the bottom, step flashing up the sides, and back flashing at the high side.
Why chimneys leak: The different materials (masonry chimney and tile roof) expand and contract at different rates. This movement stresses the flashing seals. Cracked or missing mortar at the chimney joints allows water behind the flashing. Degraded chimney caps let water run down inside the flashing system.
The real challenge: Chimney flashing repairs often reveal broader chimney problems. Repointing may be needed, the chimney may require waterproofing, or the crown might need repair. A comprehensive inspection determines the full scope.
For heritage homes with original chimneys, we need to balance effective waterproofing with maintaining the property’s character. This often involves custom metal work to match original profiles while meeting current weatherproofing standards.
Penetration Flashing for Skylights and Vents
Every hole through your roof, whether for skylights, whirly birds, vent pipes, or satellite mounts, needs proper flashing. Each penetration type has specific requirements.
Skylights: Modern skylights come with integrated flashing kits designed for the specific model. The critical points are where the skylight flashing transitions to the surrounding tile work. These junctions must seal perfectly while allowing for thermal movement.
Poor skylight installation is a major leak source. We’ve seen skylights installed without proper underlayment, with gaps in the corner joints, or using generic flashing instead of manufacturer-specific kits. If your skylight leaks, the problem is nearly always the flashing, not the skylight itself.
Pipe penetrations: Plumbing vents and similar pipes use rubber boots or metal collars. Rubber boots deteriorate from UV exposure within 10 to 15 years and need regular replacement. Metal collars last longer but require proper sealing where they meet the pipe and tiles.
The inspection challenge: Many roof penetrations are only visible from the roof itself. Ground-level inspections miss these completely. If you’re experiencing mystery leaks, having a professional roof leak repair specialist inspect all penetrations is essential.
What Current Australian Standards Require for Tiled Roof Flashing
Professional flashing work must comply with building codes and Australian Standards. Understanding these requirements helps you evaluate whether past work was done correctly and what to expect from new installations.
National Construction Code (NCC 2022) Requirements
The NCC establishes mandatory performance standards for weatherproofing. For roof flashing, this means installations must prevent water penetration under all reasonably expected weather conditions for your location.
Sydney falls into a high rainfall wind zone, which affects flashing design. The code requires:
- Adequate width and overlap to handle expected water volumes
- Proper fixing to resist wind uplift
- Compatible materials that won’t cause accelerated corrosion
- Installation that accommodates thermal movement without compromising seals
Importantly, the NCC emphasises that flashing work must be done by qualified tradespeople. This isn’t DIY territory, both for safety reasons and because incorrect installation voids warranties and may create insurance issues.
AS 2050: Installation of Roof Tiles
This Australian Standard provides detailed specifications for tiled roofing, including comprehensive flashing requirements.
Key provisions include:
Minimum overlaps: Flashing joints must overlap at least 75mm in the direction of water flow. This ensures water can’t work its way between flashing sections, even under wind-driven rain.
Upturn heights: Where flashing meets vertical surfaces, the upturn must be minimum 75mm above the tile level. This prevents splashback and wind-driven rain from getting behind the flashing.
Material compatibility: Different metals in direct contact create galvanic corrosion. The standard requires proper separation or use of compatible metals. Galvanised steel and Zincalume can be used together. Copper requires isolation from other metals.
Fixing requirements: Flashing must be mechanically fastened at specified intervals, not just held by mortar. This ensures it stays in place during storms and temperature changes.
Moulding into tiles: Valley and other flashing must be properly formed to match the tile profile, ensuring water flows over the flashing onto tiles rather than getting underneath.
Lead-Free Requirements
Lead flashing is prohibited in many Australian water catchment areas due to contamination concerns. Sydney Water’s catchment area has specific restrictions. If your roof feeds into rainwater tanks for household use, lead flashing is not permitted.
Modern lead-free alternatives like Wakaflex tape or lead-free metals provide effective waterproofing without contamination risk. These materials have become industry standard across most of Sydney.
Why Standards Matter to You
Buildings insurance often requires that repairs and installations meet current Australian Standards. If flashing work doesn’t comply and a leak causes damage, your claim might be denied.
When getting quotes for flashing work, confirm that contractors will follow AS 2050 and NCC requirements. This should be standard, but some less scrupulous operators cut corners. Proper documentation and compliance give you protection and peace of mind.
Professional Flashing Replacement: What to Expect
Understanding the process helps you evaluate quotes and know what proper flashing work involves. Replacement isn’t a quick patch job. It requires methodical work to ensure long-lasting results.
Initial Inspection and Assessment
The first step is a comprehensive roof inspection. This isn’t done from the ground, it requires getting on the roof to examine flashing conditions, check for hidden damage, and assess the overall roof state.
What professionals look for:
- Visible rust, corrosion, or deterioration
- Lifted or separated flashing sections
- Gaps where water can enter
- Condition of seals and fasteners
- Hidden damage under mortar or tiles
- Underlying rot or damage from past leaks
- Overall roof condition and any related issues
The inspection should also check your roof cavity for signs of water damage. Ceiling stains visible from inside often indicate leaks that have been occurring for some time. Finding the source prevents ongoing damage.
After inspection, you should receive a detailed quote outlining:
- Specific flashing sections requiring replacement
- Materials to be used (with specifications)
- Scope of work, including any tile lifting needed
- Timeline for completion
- Total cost broken down by components
- Warranty information
The Replacement Process
Professional flashing replacement follows a systematic approach to ensure quality results.
Step 1: Preparation and access Setting up safe access with scaffolding or roof anchors, establishing edge protection for worker safety, and protecting landscaping and outdoor areas from falling debris.
Step 2: Careful removal of old flashing Tiles adjacent to the flashing are carefully lifted without breaking them. This requires skill, as older terracotta tiles are brittle. The old flashing is removed, along with any deteriorated sealants or mortar. The area underneath is inspected for rot, damage, or other issues that need addressing before new flashing goes in.
Step 3: Preparation of the surface The substrate is cleaned thoroughly. Any damaged battens or sarking are repaired. Underlayment membrane is installed if required by current standards (many older roofs lack this).
Step 4: Installation of new flashing New flashing is cut to size and shaped to match your tile profile. It’s positioned with proper overlaps and correctly oriented for water flow. The flashing is mechanically fastened at specified intervals. Seals are applied at all joints and penetrations using appropriate sealants rated for outdoor exposure.
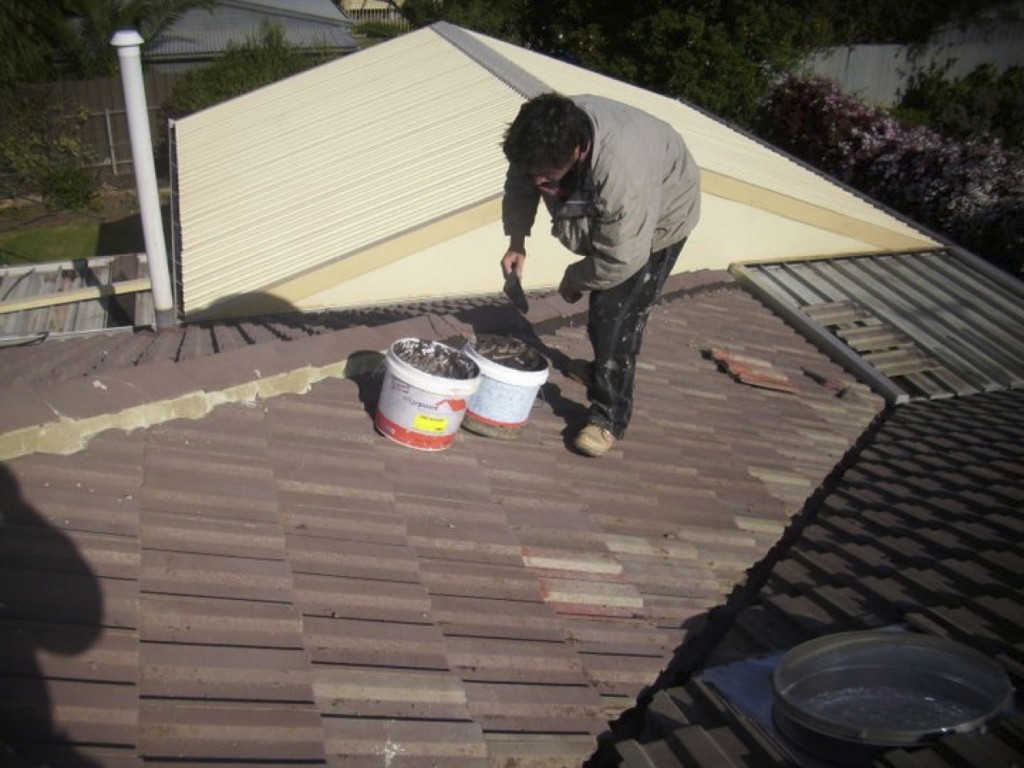
Step 5: Tile replacement and finishing Tiles are carefully returned to position and refastened. Any mortar work needed (such as repointing where flashing meets chimneys) is completed. The entire installation is inspected to verify proper water flow and complete sealing.
Step 6: Final inspection and testing A final check ensures all components are correctly installed. In some cases, water testing confirms the repair is leak-free. The work area is cleaned, and all debris is removed.
Materials Used in Modern Flashing Installation
Quality materials make the difference between flashing that lasts 15 years and flashing that lasts 30 years.
Colorbond steel: Pre-painted steel with a protective coating. Available in various colours to match your roof. Excellent durability in Sydney’s climate. Typically lasts 20 to 30 years with minimal maintenance.
Zincalume: Aluminium-zinc alloy coated steel. Extremely corrosion-resistant, especially in coastal areas. Often used where appearance is less critical (like hidden valley sections). Similar lifespan to Colorbond.
Aluminium: Lightweight and naturally corrosion-resistant. Requires coating in coastal areas. More prone to damage from physical impact. Generally has a shorter lifespan than steel options but works well in specific applications.
Lead-free flexible tapes: Products like Wakaflex offer easy installation and good durability. They’re particularly useful for complex shapes and retrofit situations. These materials have gained popularity over the past few years as effective alternatives in high-movement areas.
Sealants and underlayment: High-quality polyurethane or MS polymer sealants provide flexible, long-lasting seals. Proper underlayment membrane beneath flashing offers secondary protection. These supporting materials are as important as the flashing itself.
Timeline and Disruption
Flashing replacement is weather-dependent. Work can’t proceed during rain, and freshly applied sealants need dry conditions to cure. For typical projects:
Small repairs (single section of step flashing or a penetration) often complete in half a day to one day.
Valley replacement usually takes one to two days depending on length and access.
Complete chimney flashing requires one to two days, potentially longer if extensive repointing is needed.
Whole-roof flashing replacement during restoration might take several days to a week or more, depending on roof size and complexity.
Sydney Wide Roofing Co schedules work around weather forecasts and keeps clients informed of any delays. We also ensure your roof is weather-tight each day before we leave, so overnight rain won’t cause problems.
Preventing Future Flashing Problems
Once your flashing is repaired or replaced, a few sensible practices extend its life and prevent early failure.
Regular Inspections Catch Issues Early
Annual visual checks from ground level can spot obvious problems. Look for:
- Rust stains running down tiles
- Lifted or damaged flashing visible from below
- Accumulated debris in valleys
- Changes in the roof profile suggesting sagging or movement
Professional inspection every 3 to 5 years provides a more thorough assessment. This is particularly important after significant weather events. Sydney and Perth pricing trends higher due to labour and access, but the cost of inspection is minimal compared to leak repairs.
After storms, even if you don’t notice leaks, having a quick inspection confirms everything is still properly sealed. Often minor issues can be fixed on the spot, preventing future problems.
Keep Valleys Clear of Debris
Leaves, twigs, and other material accumulate in valleys, particularly if you have overhanging trees. This debris holds moisture against the flashing metal, accelerating corrosion. It also clogs water flow, causing overflow during heavy rain.
Cleaning valleys annually, typically before Sydney’s wettest months (June through August), prevents buildup. This is part of routine roof maintenance and takes minimal time.
If you’re comfortable with heights and have proper safety equipment, this can be a DIY task. Otherwise, include it in your regular gutter cleaning service. Most roofing companies offer maintenance packages that include valley clearing.
Address Small Issues Promptly
When you notice the first signs of flashing problems—a small rust spot, slight lifting, or minor gaps—get them checked. Early intervention costs substantially less than waiting until major leaks develop.
We often hear: “I noticed that rust patch two years ago but figured I’d wait until it got worse.” By the time “worse” arrives, what was a simple reseal becomes a full replacement with added cost for water damage repairs.
Consider Your Environment
If you’re in a coastal area, your flashing faces harsher conditions. Salt air is particularly aggressive toward metal. Using premium materials like Colorbond specifically designed for marine environments makes sense. The extra upfront cost is offset by extended lifespan.
Properties with significant tree coverage see faster debris accumulation and should schedule more frequent cleaning. North-facing roof sections receive more intense sun exposure, aging sealants faster. These sections may need attention before others.
Document Your Flashing Work
Keep records of when flashing was installed or replaced, including:
- Date of work
- Contractor details
- Materials used
- Warranty information
- Photos of the completed work
This documentation is valuable for insurance purposes, future resale, and planning future maintenance. It also helps the next roofing contractor understand what’s been done and when work might be due again.
Common Questions About Tiled Roof Flashing
How much does flashing replacement typically cost in Sydney?
Costs vary considerably based on the type of flashing, roof access, and extent of work. Minor repairs might start around $180 for simple resealing. Replacing a single small flashing can be as low as $180 to $450, while complete flashing systems during roof rectification can exceed $2,000 to $5,000 plus depending on access, length, and material.
For accurate pricing on your specific situation, it’s best to get quotes from qualified roofing contractors who can inspect your roof directly. Factors like two-storey access, steep pitch, and the need for scaffolding all affect final cost.
Can I install or repair flashing myself?
Flashing work requires working at height on a pitched roof surface, which presents serious safety risks. It also requires specific skills: cutting and shaping metal accurately, understanding water flow patterns, and knowing how to create proper seals that will last.
Incorrect flashing installation causes more problems than it solves. Water will find any gap or flaw, and fixing improper DIY work often costs more than doing it professionally from the start. Additionally, DIY flashing work may void roof warranties and could affect insurance coverage if leaks cause damage.
For safety and quality reasons, professional installation is strongly recommended. Licensed roofing contractors have the training, equipment, and insurance to do the job safely and correctly.
How long should properly installed flashing last?
Colorbond and Zincalume flashings typically last 15 to 30 years depending on environment. Several factors influence lifespan:
Material quality: Premium materials like Colorbond in thicker gauges outlast budget options. The coating thickness and quality make a substantial difference.
Installation quality: Flashing installed according to AS 2050 standards lasts longer than shortcuts. Proper overlaps, adequate fastening, and correct sealing all contribute to longevity.
Environmental exposure: Coastal properties see faster deterioration than inland areas. Properties with tree coverage that keeps flashing shaded and damp may also see reduced lifespans.
Maintenance: Regular cleaning and prompt attention to minor issues extends flashing life significantly. Neglected flashing fails sooner.
With quality materials, professional installation, and reasonable maintenance, you should expect 20 to 25 years from modern flashing systems in most Sydney locations. Coastal areas might see 15 to 20 years, while sheltered inland properties could exceed 30 years.
What’s the difference between step flashing and apron flashing?
Both seal roof-to-wall junctions, but they work differently.
Apron flashing is a continuous piece installed where a wall runs perpendicular to the roof slope (across the fall of the roof). Imagine where the lower edge of a wall sits on top of tiles. The apron flashing sits beneath those tiles and extends up the wall, with the top edge turned up at least 75mm and sealed or tucked into mortar joints.
Step flashing is used where a wall runs parallel to the roof slope (up and down the fall). Instead of one continuous piece, step flashing uses multiple short sections that interlock with each course of tiles as you move up the roof. Each piece steps up from the one below it, creating a continuous barrier that accommodates both tile coursing and brick or weatherboard patterns.
Both types serve the same purpose—directing water away from the wall junction—but the installation method differs based on the roof geometry.
Do I need to replace flashing when repointing ridge caps?
Not necessarily, but it’s an ideal time to inspect and replace if needed. Ridge cap repointing requires removing old mortar and disturbing the ridge area. If your flashing is over 15 years old or showing signs of deterioration, replacing it while tiles are already lifted makes practical sense.
The access work is already done, scaffolding is in place, and the additional cost for flashing replacement is lower than doing it as a separate job later. Many homeowners choose to address both at once to avoid future disruption.
However, if flashing was recently replaced and is in good condition, leaving it alone is perfectly fine. Your roofing contractor should assess flashing conditions during repointing work and advise accordingly.
What causes rust on roofs flashing so quickly?
Several factors accelerate rust formation:
Moisture exposure: Sydney’s humidity and regular rainfall keep flashing damp. If debris accumulates or water pools, the metal stays wet longer, speeding corrosion.
Salt air in coastal areas: Properties within a few kilometres of the ocean face constant salt exposure. Salt is highly corrosive to most metals. Even Colorbond and Zincalume, while resistant, will eventually succumb in marine environments.
Incompatible materials: When different metals touch directly, galvanic corrosion occurs. The more reactive metal (usually galvanised steel or aluminium) corrodes rapidly. Proper installation separates dissimilar metals.
Damaged coating: Scratches or cuts in protective coatings expose bare metal. Once rust starts at these points, it spreads underneath the coating. This often happens during installation if materials aren’t handled carefully.
Inadequate material quality: Thinner metal corrodes through faster. Budget flashing materials with minimal coating protection don’t last in Sydney’s climate.
Hidden water traps: Mortar bedding that holds water against flashing, or valleys where debris accumulates, create constant moisture exposure. These areas rust first, often while visible sections still look fine.
Can flashing be painted or coated to extend its life?
Once flashing is installed, painting is difficult and generally not recommended. The flashing is partially covered by tiles and mortar, making complete coverage impossible. Paint or coating that isn’t applied comprehensively leaves gaps where corrosion continues.
Some specialised roof coatings can be applied to exposed flashing sections, but their effectiveness depends on surface preparation and compatibility with the flashing material. These coatings work best as preventive measures on relatively new flashing, not as rescue attempts for already corroded sections.
If your flashing is deteriorating, replacement with quality materials provides a far better long-term solution than trying to extend its life with coatings.
For new installations, using premium pre-finished materials like Colorbond eliminates the need for coating. The factory-applied finish is superior to anything applied on-site.
What should I look for in a flashing contractor?
When selecting a roofing contractor for flashing work, several factors indicate quality and reliability:
Licensing and insurance: Verify the contractor holds appropriate licensing for roofing work in NSW. Confirm they carry current public liability insurance and workers compensation coverage. This protects you if accidents occur.
Experience with tiled roofs: Flashing work on tiles requires different skills than sheet metal roofing. Ask specifically about experience with terracotta or concrete tiles matching your roof type.
Willingness to provide detailed quotes: Quality contractors provide written quotes specifying materials (brand and gauge), scope of work, timeline, and warranty terms. Vague quotes or reluctance to specify details are warning signs.
References and examples: Ask for recent references from similar projects. Reputable contractors readily provide these. Online reviews offer additional insight, though take individual reviews in context of overall patterns.
Compliance with standards: Confirm the contractor will follow AS 2050 and NCC requirements. This should be standard, but asking demonstrates you’re informed and expect proper work.
Communication and professionalism: How contractors respond to initial inquiries indicates how they’ll perform. Prompt communication, clear answers to questions, and professional conduct are positive signs.
Realistic timelines: Be wary of contractors who can start immediately when others are booked weeks out. Quality contractors are usually busy, especially during peak seasons.
Sydney Wide Roofing Co has been serving Sydney’s metro area for years, with qualified tradespeople experienced in all aspects of tiled roof flashing. We provide transparent quotes, use quality materials, and stand behind our work with comprehensive warranties.
Is Your Flashing Due for Inspection?
Flashing is the hidden protector your tiled roof can’t function without. While tiles get all the attention, those metal strips at every junction do the critical work of keeping water outside where it belongs.
If your roof is over 15 years old, if you’ve noticed any warning signs, or if you haven’t had a professional inspection in the past few years, now is the time to check your flashing condition. Catching problems early saves you from ceiling repairs, damaged insulation, and structural issues that leak can cause.
The investment in proper flashing maintenance pays dividends through decades of reliable weather protection. Quality materials, professional installation, and timely attention to issues mean your roof performs as designed, year after year.
Sydney Wide Roofing Co provides comprehensive flashing inspections, repairs, and replacements throughout Sydney, from the Eastern Suburbs to Western Sydney, North Shore to the Sutherland Shire. Our qualified team understands tiled roofs thoroughly and can address any flashing concern you have.
Whether you need a quick check after storm damage, repairs to address a current leak, or complete flashing replacement during roof restoration, we bring the expertise and quality workmanship your home deserves. Contact Sydney Wide Roofing Co today to schedule your flashing inspection and protect your home from Sydney’s next downpour.